今回は、GitHubAcitonsとAWSを連携したCI/CD環境に、terraformコマンドの実行結果をSlackに通知する「tfnotify」を実装する方法をご紹介します。
実装のイメージ図は以下です。
terraform plan・applyの実行結果をSlackに通知する手段として、オープンソースの「tfnotify」を利用します。

tfnotifyとは
tfnotifyとは、メルカリで開発されたTerraformの実行結果通知用のツールです。
今回はGitHubAcitonsとの連携をご説明しますが、元々はCircleCIとの連携が前提で開発されています。(参考)
※本記事の「備考」で後述しますが、GitHubActionsでの使用に制限があります。
前提条件
・GitAcitions(Terraform)とAWSを連携したCI/CDが構築されている 参考
・Slackを利用している
Slackの設定
tfnotifyを使用するには、Slack側でアプリの設定が必要です。
手順は以下です。
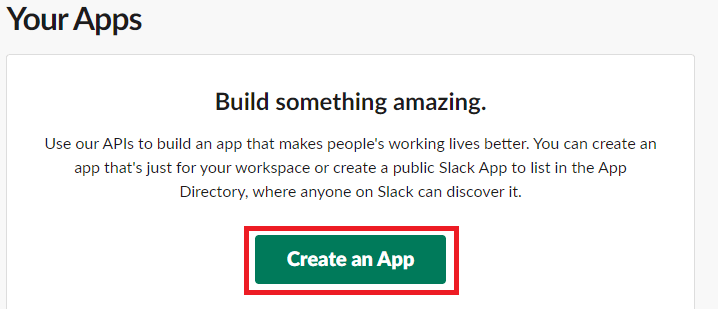
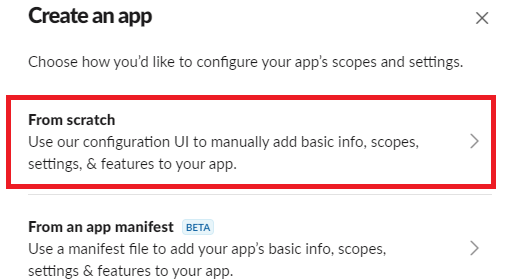
①Slackの管理ページ https://api.slack.com/apps にアクセスする。
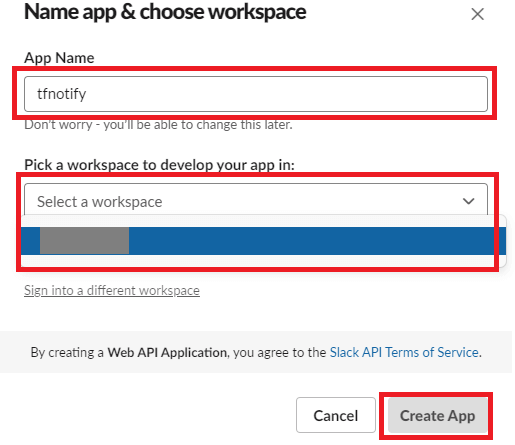
④[App Name]に「tfnotify」と入力し、[Pick a workspace to develop your app in:]のプルダウンメニューから、通知先のワークスペースを選択する。
[Create App]をクリックする。
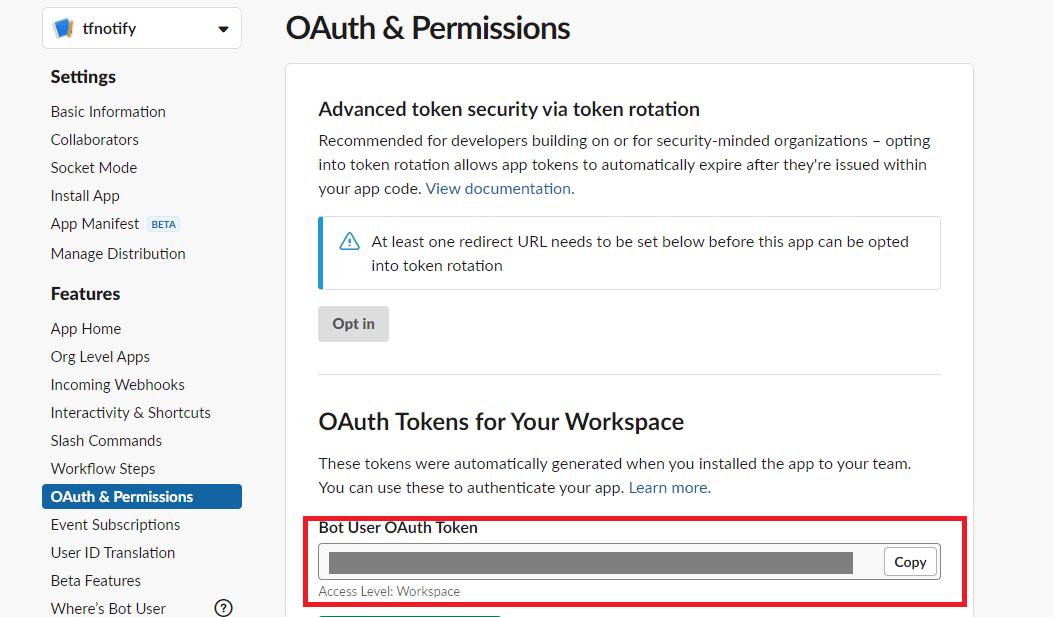
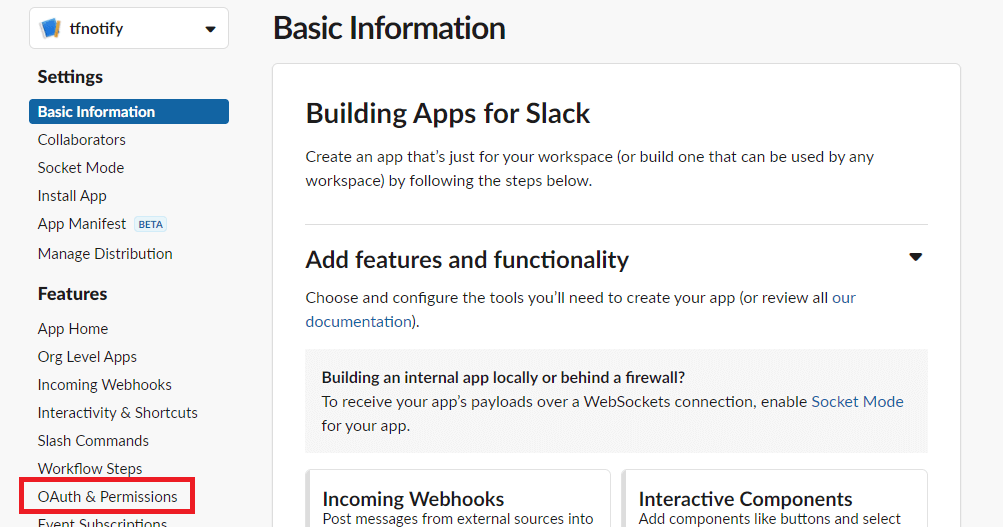
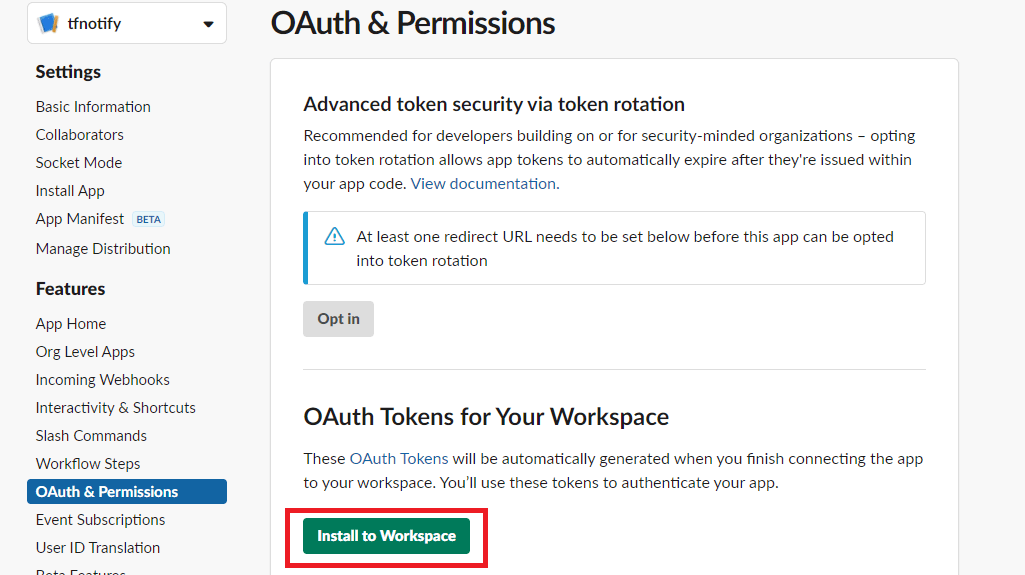
⑤[OAuth & Permissions]をクリックする。
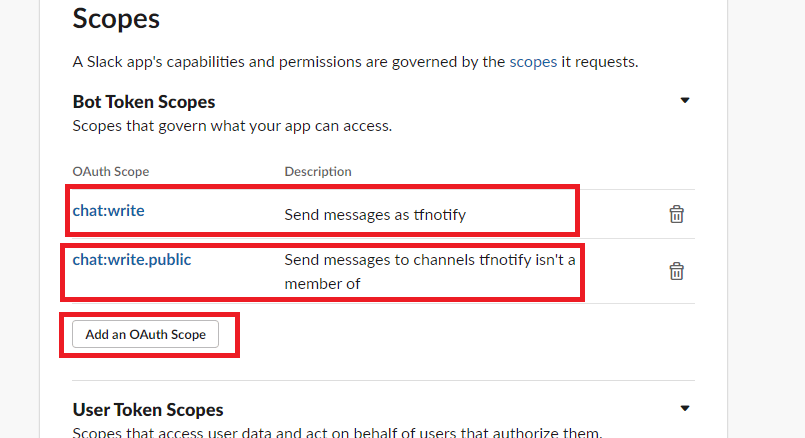
⑥[Scopes]の[Bot Token Scopes]にて[Add an OAuth Scope]をクリックする。
「chat:write」を選択して追加する。
「chat:write.public」選択して追加する。
⑦[Install to Workspace]をクリックする。
⑨Slackを開いて、[アプリを追加する]から[tfnotify]を追加する。

⑩GitHubAcitosでのTerraform実行結果を通知したいチャンネルを開く。
画面左上のチャンネル名をクリックする。

⑪[インテグレーション]タブにて、[アプリを追加する]をクリックして、[tfnotify]を追加する。

Slack側の準備は以上です。
GitHubの設定
リポジトリの構成は以下です。
<リポジトリ>
├── .github/workflows
│ ├── terraform-plan.yml (terraform plan + 結果通知)
│ └── terraform-apply.yml (terraform apply + 結果通知)
│
├── .tfnotify
│ └── slack.yml (結果通知のフォーマット設定)
│
├──terraform
│ └── main.tf
│
├── .gitattributes
│
└──.gitignoretfnotifyによる通知のために設定するファイルは「slack.yml」「terraform-plan.yml 」「terraform-apply.yml」の 3つです。
事前に次のGitHubのシークレットを設定しています。
| 設定値 | 備考 |
| AWSアクセスキーID | Terraform実行用IAMユーザーのアクセスキーID |
| AWSシークレットアクセスキー | Terraform実行用IAMユーザーのシークレットアクセスキー |
| Sackのトークン | 上記の手順⑧で生成したトークン |
| 通知先SlackチャンネルのID | 上記の手順⑪の[チャンネル情報]タブで確認 |
1.slack.yml
ワーフクローでSlackで実行結果を表示する時のフォーマットを定義します。
ci: github-actions
notifier:
  slack:
    token: $SLACK_TOKEN
    channel: $SLACK_CHANNEL_ID
    bot: $SLACK_BOT_NAME
terraform:
  use_raw_output: true
  plan:
    template: |
      {{ .Message }}
      {{if .Result}}
      ```
      {{ .Result }}
      ```
      {{end}}
      ```
      {{ .Body }}
      ```
  apply:
    template: |
      {{ .Message }}
      {{if .Result}}
      ```
      {{ .Result }}
      ```
      {{end}}
      ```
      {{ .Body }}
```参考:https://github.com/mercari/tfnotify
2.terraform-plan.yml
name: terraform plan
on:
  pull_request:
    branches:
      - 'master'

jobs:
  plan:
    name: terraform plan
    runs-on: ubuntu-latest
    steps:
      - name: checkout
        uses: actions/checkout@v2

      - name: configure AWS credentials
        uses: aws-actions/configure-aws-credentials@v1
        with:
          aws-access-key-id: ${{ secrets.<AWSアクセスキーIDのシークレット> }}
          aws-secret-access-key: ${{ secrets.<AWSシークレットアクセスキーのシークレット> }}
          aws-region: ap-northeast-1

      - name: setup tfnotify
        run: |
          sudo curl -fL -o tfnotify.tar.gz https://github.com/mercari/tfnotify/releases/download/v0.7.0/tfnotify_linux_amd64.tar.gz
          sudo tar -C /usr/bin -xzf ./tfnotify.tar.gz
      - name: terraform setup
        uses: hashicorp/setup-terraform@v1
        with:
          terraform_version: <Terraformのバージョン>

      - name: terraform init
        id: init
        run: terraform init
        working-directory: ./terraform

      - name: terraform plan
        id: plan
        working-directory: ./terraform
        run: |
         terraform plan -no-color | tfnotify --config ../.tfnotify/slack.yml plan --message "$(date)"
        env:
         SLACK_TOKEN: ${{ secrets.<Slackのトークンのシークレット> }}
         SLACK_CHANNEL_ID: ${{ secrets.<通知先SlackチャンネルIDのシークレット> }}
         SLACK_BOT_NAME: tfnotify

      - uses: actions/github-script@0.9.0
        env:
          STDOUT: "```${{ steps.plan.outputs.stdout }}```"
        with:
          github-token: ${{ secrets.GITHUB_TOKEN }}
          script: |
            github.issues.createComment({
              issue_number: context.issue.number,
              owner: context.repo.owner,
              repo: context.repo.repo,
              body: process.env.STDOUT
})※通知先はSlackだけでなく、GitHub上からでも確認できるよう、「actions/github-script@0.9.0」をワークフローに設定しています。
この設定で、プルリクエストのコメントにterraformコマンドの実行結果をbotが表示してくれます。
terraform-apply.yml も同様です。
3.terraform-apply.yml
name: terraform apply
on:
  pull_request:
    types: [closed]
    branches:
      - 'master'
jobs:
  plan:
    name: terraform apply
    runs-on: ubuntu-latest
    if: github.event.pull_request.merged == true
    steps:
      - name: checkout
        uses: actions/checkout@v2

      - name: configure AWS credentials
        uses: aws-actions/configure-aws-credentials@v1
        with:
          aws-access-key-id: ${{ secrets.<AWSアクセスキーIDのシークレット> }}
          aws-secret-access-key: ${{ secrets.<AWSシークレットアクセスキーのシークレット> }}
          aws-region: ap-northeast-1

      - name: setup tfnotify
        run: |
          sudo curl -fL -o tfnotify.tar.gz https://github.com/mercari/tfnotify/releases/download/v0.7.0/tfnotify_linux_amd64.tar.gz
          sudo tar -C /usr/bin -xzf ./tfnotify.tar.gz

      - name: terraform setup
        uses: hashicorp/setup-terraform@v1
        with:
          terraform_version: <Terraformのバージョン>

      - id: init
        run: terraform init
        working-directory: ./terraform

      - id: apply
        working-directory: ./terraform
        run: |
         terraform apply -auto-approve -no-color | tfnotify --config ../.tfnotify/slack.yml apply --message "$(date)"
        env:
         SLACK_TOKEN: ${{ secrets.<Skackのトークンのシークレット> }}
         SLACK_CHANNEL_ID: ${{ secrets.<通知先SkackチャンネルIDのシークレット> }}
         SLACK_BOT_NAME: tfnotify


      - uses: actions/github-script@0.9.0
        env:
          STDOUT: "```${{ steps.plan.outputs.stdout }}```"
        with:
          github-token: ${{ secrets.GITHUB_TOKEN }}
          script: |
            github.issues.createComment({
              issue_number: context.issue.number,
              owner: context.repo.owner,
              repo: context.repo.repo,
              body: process.env.STDOUT
            })
動作確認
設定ファイルをGitHubに格納後、プルリクエストを実行してGitHubAcitonsを発火させます。
GitHubActionsでterraform planが実行されると、設定したSlackチャンネルに通知が投稿されます。
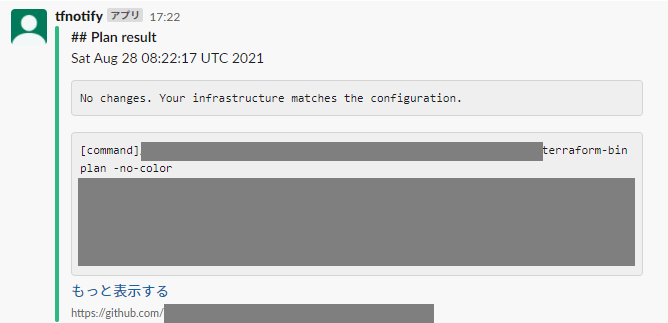
リソース変更数が行頭のフォーマットで通知されますが、「slack.yml」を編集してフォーマットを変更できます。(参考)
備考
今回はSlack通知にのみ「tfnotify」を使用しましたが、GitHub上でbotによるコメント表示にも使用することができます。
ただし、ワークフローのトリガーがプルリクエストだとbotでによるコメント表示ができないため、今回GitHub上でのコメント表示には「actions/github-script@0.9.0」を使用しています。
※トリガーがプッシュだとGitHub上でのコメント表示も可能です。(参考)
以上となります。
この記事を通して、少しでもCI/CD環境構築のお役に立てれば幸いです。
